
Do you want to start programming in Scala? Like any relatively new technology, there is a bit of mystique and smoke around it. Therefore, you want to demystify those unicorns out there and see for yourself what the language and its ecosystem have to offer. You’ve heard that Scala allows you to program in an object-oriented way, but you can also start to get into functional programming. All you need to do is take the first step 🦄 In this video, we will break down a sample repository file by file to get you started programming in this language while following the best practices of its ecosystem 🚀
Step by Step to Start Programming in Scala
In today's video, we explain it step by step, and we even delve into how the dependency system, scalastyle, ScalaFmt, and some other aspects included in the sample repository work. However, the process can be summarized as follows:
- Install JDK 8 and SBT
- Create the folder for our kata:
mkdir kata_molona - Clone the Scala Bootstrap repository:
git clone https://github.com/CodelyTV/scala_bootstrap.git kata_molona- An alternative option, if we want to have our own git repository to which we can upload our solution to the supposed kata or exercise, would be to fork the repository on GitHub and clone our own fork. This way, we can publish the progress we make 🙂.
- Move to the kata directory:
cd kata_molona - Enter SBT:
sbt - Run the tests:
test - Join the nearest Scala meetup like ScalaBcn, ScalaMad, or Scala Málaga, and subscribe to CodelyTV 😛
How to Set Up IntelliJ
- At the IDE level, we can use whichever we prefer. However, we recommend the Community Edition of IntelliJ as it will allow us to navigate through our classes comfortably.
- Once we open the IDE, go to Preferences > Plugins, and install the Scala plugin. This will provide support primarily for Scala syntax recognition.
- Additionally, while we're at it, it would be advisable to install the Scalafmt plugin. With this style formatter and the rules defined in the bootstrap project, it will be just a simple "Ctrl+Shift+L" to make our code follow the defined style guide.
- For the plugins to take effect, we will need to restart IntelliJ.
- Once restarted, we will open our project by Import project > Double click on the file
kata_molona/build.sbt, and a dialog like the following will appear: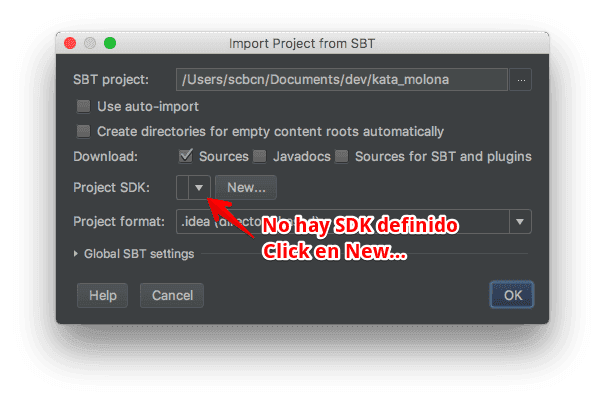
Importing SBT Project - If we don’t have an SDK to select, we will need to create one by specifying the location of the JDK we installed. On MacOS it should be something like:
/Library/Java/JavaVirtualMachines/jdk1.8.0_66.jdk/Contents/Home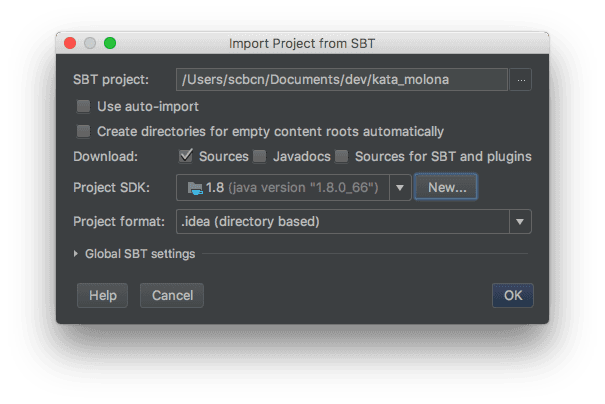
Importing SBT Project with SDK Defined - From here, we simply accept the import project dialog and confirm the inclusion of the two modules.
- After waiting a while for IntelliJ to index the files of our project for the first time, we will already have our development environment ready! The test we can do regarding this is to open the
Codelyberclass and see that the IDE can correctly highlight the syntax: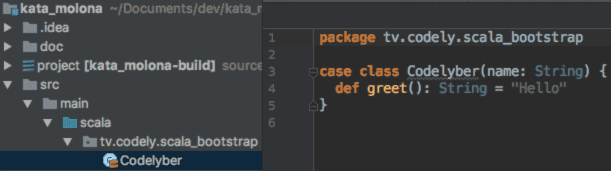
Syntax Highlighting in Codelyber Class - #CodelyTip: Remember to ignore the
.ideadirectory in your global git configuration to avoid versioning your IDE configuration and also to keep the.gitignorefile of the project clean 🙂
See you in the next video! Remember to subscribe so you don't miss the upcoming ones! More developer interviews, and alternative solutions to the Finder Refactoring kata await us 😬