WebMCP is the best thing that has happened to HTML since HTML 5. It is a new way for agents to interact with our websites.
In this post we are going to explain how it works and how to implement it using just 2 HTML attributes.
What is WebMCP?
Currently, AI agents can control web pages.
The most visual example is how browsers like Atlas, Dia, Comet work… You have a chat next to the browser where you can tell them to fill in a form and they do it.
Another example we saw recently with Claude Cowork. It is capable of launching a Google Chrome to perform operations.
But there are other types, for instance giving a programming agent (Claude Code, GitHub Copilot…) access to the Playwright MCP. This way the agent can send instructions like: scroll, click this link, and similar.
But these cases have a big problem: they are slow since agents "have to mimic" human behavior.
Websites are designed for humans, not agents.
This is where WebMCP comes into play, a standard for agents to have their own optimal way of using the web.
And honestly, the implementation they have done is outstanding, since they added a declarative API where you just need to slightly modify your HTML and that's it.
How to try it
- First of all, we need to download the latest Canary version of Google Chrome. It is for now the only browser where it is available.
- Once downloaded, we need to enable a flag to activate WebMCP. To do this, go to this URL and search for "WebMCP for testing". They have given it a very explicit name to denote that it is a first version and that its API may change as it matures.
- Now that we have the browser with WebMCP support, we need an agent compatible with it. For now the only way to use it is through a Google Chrome extension they have published.
- For the extension agent to work, we need a Gemini API key. This can be obtained for free for testing purposes.
- To do this, we need to create a new project in Google AI Studio and click "Create API key".
- That API key is the one we will use in the extension.
- We can test it on this website they have launched for this purpose. If everything works correctly, we should see that it detects a tool and that we can invoke it from the extension.
How to implement WebMCP
There are 2 APIs to implement WebMCP: The declarative and the imperative.
Declarative API
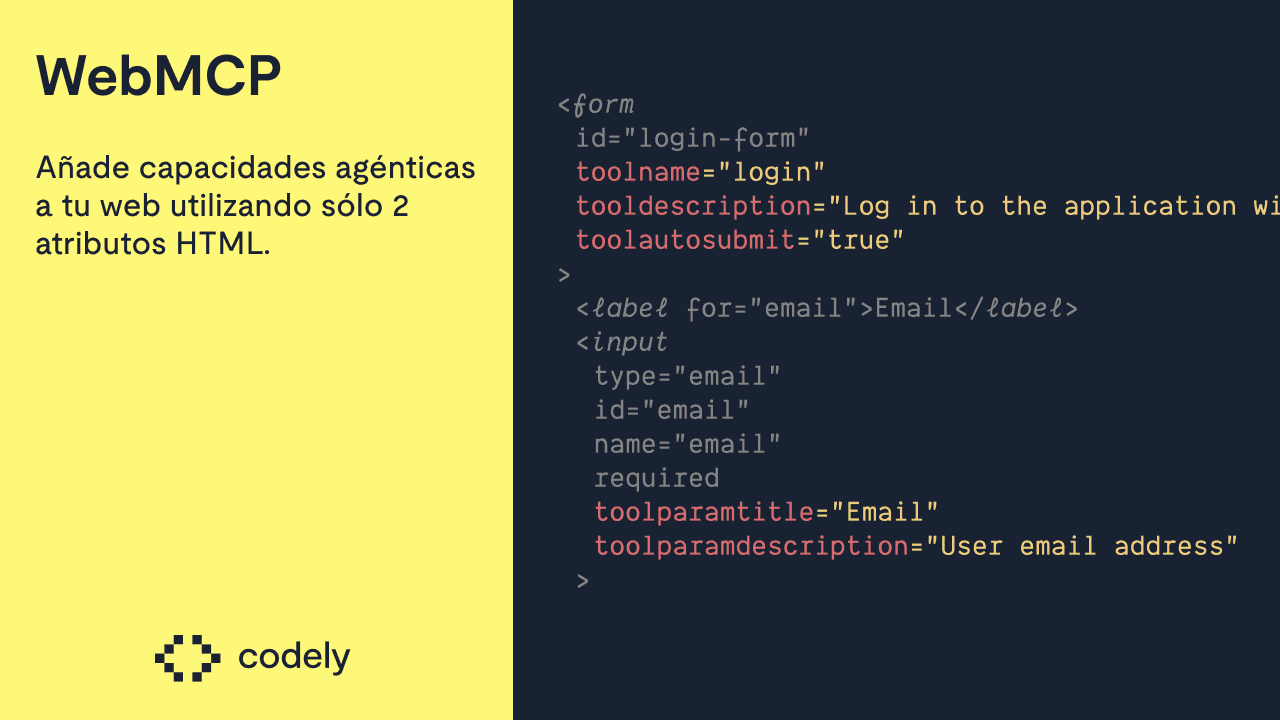
The fact that they thought of the declarative API is something we love, because it makes adding WebMCP to an existing website as simple as adding a couple of HTML attributes to your forms:
toolname: Required. By adding this attribute to your<form>, you are telling it that it will be a WebMCP tool. Here you need to specify the tool name. For example, if it were a form to publish a comment, it could be calledpublish-comment.tooldescription: Required. It is the description of what your tool does. If you do not add this attribute along withtoolname, your form will not be declared as a WebMCP tool.toolautosubmit: Optional. It makes the form submit automatically when the agent fills it in. If the attribute does not exist, the agent will fill in the form and nothing else.
An example of how a form could look:
<form
	id="login-form"
	toolname="login"
	tooldescription="Log in to the application with email and password"
	toolautosubmit="true"
>
	<label for="email">Email</label>
	<input
		type="email"
		id="email"
		name="email"
		required
		toolparamtitle="Email"
		toolparamdescription="User email address"
	/>
</form>
Just by adding those attributes, we would be all set.
Imperative API
Basically, there are a series of methods to declare or remove our WebMCP tools on the fly using JS.
The browser gives us the navigator.modelContext.registerTool API to add tools by passing a name, description, and a schema of what properties it will have. Then we have an execute method which is what will happen when the agent invokes that WebMCP.
When to use each API
Being something so recent (at the time of writing this post it is just hours old) there are no defined best practices yet, but there is one that is starting to emerge: Every form should be declared as WebMCP. Reasons:
- The implementation cost is very low.
- The alternative is not that agents won't use our website, but that they will use it worse.
For other actions that do not have a form, such as logging out, we can use the imperative API. Although whether those types of actions should be a form and not a link that invokes other js, that is a topic for another post.
How we implemented it at Codely
The standard came out and we wanted to implement it from minute zero given the low cost it had.
While doing so we learned quite a few things and that is why we have published a course where we cover everything, from how each piece of each API works, to how we went step by step on the Codely website to implement it.
Conclusions
Without a doubt, WebMCP seems like a standard that is here to stay. The biggest question is when it will make the jump to Chromium so that all browsers using it under the hood will have it at their disposal.
When that moment comes, the user experience will be much better on websites that have implemented WebMCP than those that have not.